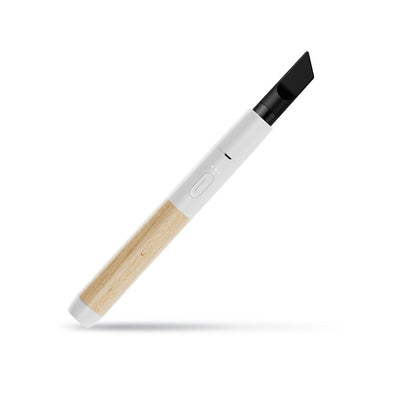
Disassembling the Vape
A faulty battery can be frustrating, especially when you rely on your vaping device for relaxation or nicotine intake. Luckily, many vape devices, like the Craftsman Series, are designed with user-friendliness in mind. This guide will walk you through the process of safely disassembling your Craftsman Series vape and replacing a malfunctioning battery, allowing you to get back to enjoying your vaping experience.
Remove the Tank
To begin, gently unscrew the mouthpiece from the top of the vape device. Next, locate the tank, which usually houses the e-liquid and atomizer coil. Grasp the tank firmly and carefully twist it counterclockwise to detach it from the battery compartment.
Unscrew the Battery Cover
Unscrew the battery cover on the side of the vape.
This will expose the battery itself, which should be easily identifiable.
Removing the Faulty Battery
A faulty battery can disrupt your vaping routine and leave you searching for solutions. Replacing a malfunctioning battery is often simpler than you might think.
Identify the Correct Battery Polarity
Before handling the battery, it’s crucial to identify its correct polarity. The battery will have two terminals: a positive (+) and a negative (-). Look for markings on the battery or in your device’s manual indicating which terminal is positive and which is negative.
Remember that inserting the battery incorrectly can damage your device and even pose a safety hazard.
Extract the Old Battery Carefully
Now that you’ve exposed the battery, it’s time to carefully remove it. To do this:
- Locate the positive (+) and negative (-) terminals on the battery. Use your device manual or markings on the battery itself as a reference.
- Gently grasp the battery by its sides, avoiding contact with the terminals.
- Slowly and carefully pull the battery straight out of the compartment.
Installing a New Battery
A faulty battery can disrupt your vaping routine and leave you searching for solutions. Replacing a malfunctioning battery is often simpler than you might think.
Insert the New Battery with Correct Polarity
Insert the new battery with its positive (+) terminal aligned with the positive (+) contact in the battery compartment. Ensure that the negative (-) terminal of the new battery lines up with the negative (-) contact.
Secure the Battery Compartment
Once the new battery is securely positioned, gently push it down until it clicks into place. This ensures a good electrical connection and prevents accidental dislodging.
Double-check that the battery is properly seated and firmly in place.
Next, screw the battery cover back onto the side of the vape device to protect the battery.
Reassembling the Vape
Reassembling your Craftsman Series vape after replacing a faulty battery is a straightforward process.
Replace the Battery Cover
With the new battery securely installed, it’s time to reassemble your Craftsman Series vape. First, carefully align the tank with the battery compartment and twist it clockwise until it is snugly attached.
Next, screw the mouthpiece back onto the top of the device, ensuring a tight seal.
Your Craftsman Series vape is now ready to use.
Screw on the Tank Securely
Screw on the tank securely in a clockwise direction until it is snug against the battery compartment.
Final Checks
A faulty battery can be a major inconvenience, interrupting your vaping routine and leaving you searching for solutions. Fortunately, many modern vape devices like the Craftsman Series are designed with user-replaceable batteries, allowing for easy maintenance and repair. This guide will walk you through the simple process of replacing a malfunctioning battery in your Craftsman Series vape, helping you get back to enjoying your vaping experience.
Verify Battery Connection
Before putting everything back together, it’s crucial to perform some final checks. Make sure the new battery is securely connected and making good contact.

- Verify Battery Connection:
- Ensure the positive (+) terminal of the battery aligns with the positive (+) contact in the compartment.
- Confirm that the negative (-) terminal is properly aligned with the negative (-) contact.
Test the Vape Functionality
To ensure optimal performance and safety, always perform a final check before using your vape device after replacing the battery. This includes verifying the connection of the new battery and testing the functionality of the vape.
- Verify Battery Connection: Inspect the battery to confirm its positive (+) and negative (-) terminals are properly aligned with the corresponding contacts in the battery compartment.
- Test Vape Functionality:
Find premium Craftsman Series vapes at the best prices
- What’s Inside The Craftsman Series Vape? A Look At Its Technology - January 1, 2026
- Traptox Aka Trapezius Botox Treatment Near Peper Harow, Surrey - December 10, 2025
- The Benefits Of CBD Gummy Edibles For Post-workout Relaxation - November 29, 2025